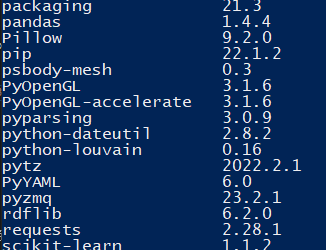
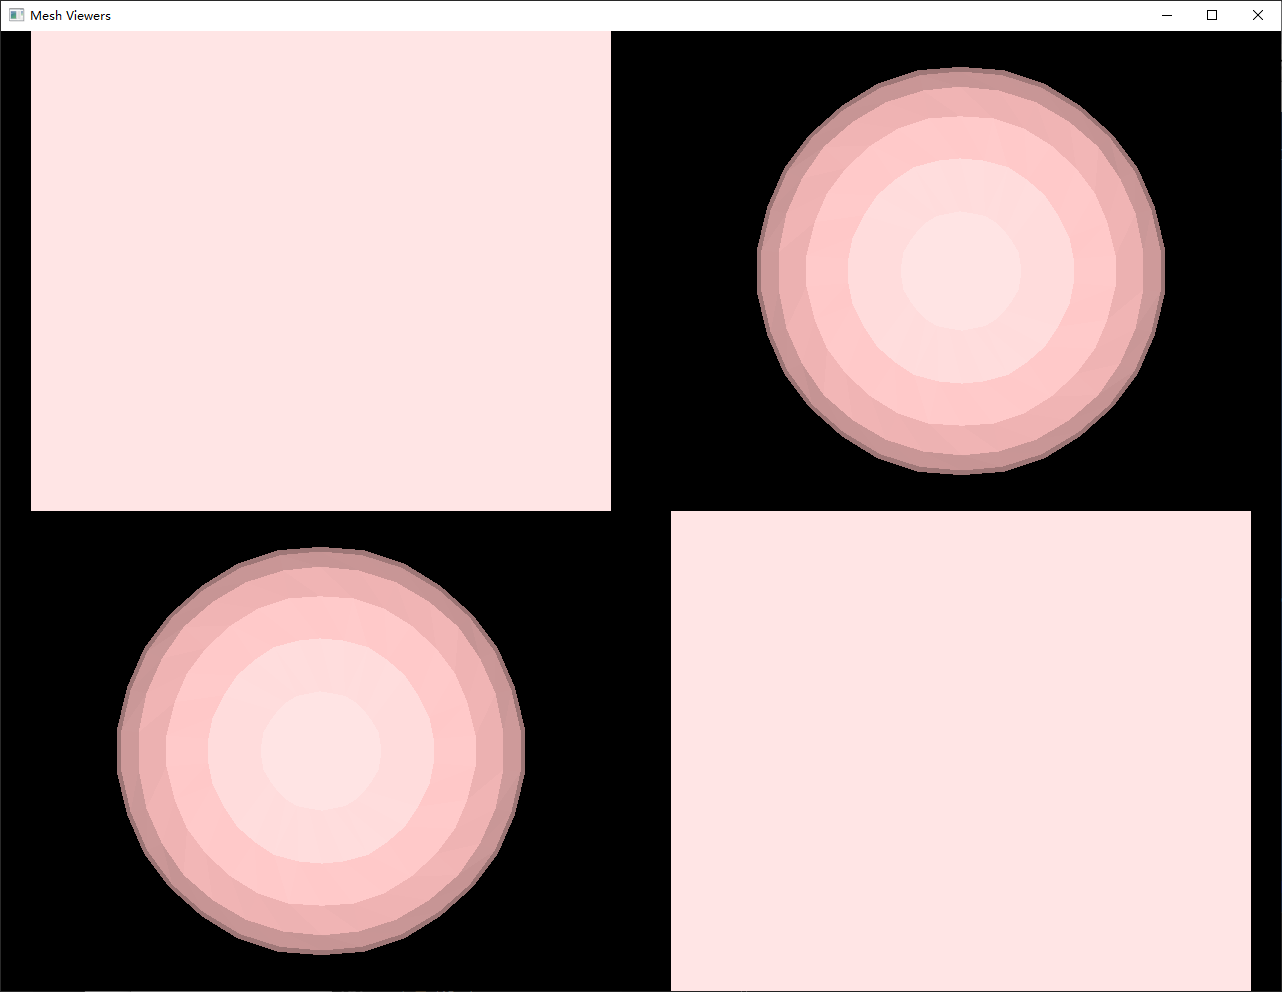
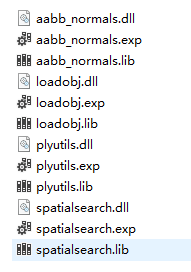
Loading... # N-Cloth 复现——环境相关 原论文名字是 《N-Cloth: Predicting 3D Cloth Deformation with Mesh-Based Networks》 ,这里记录一下论文复现遇到的一些问题、难点。 ## 配置环境 N-Cloth 依赖的库主要如下: 1. python 3.8 2. pytorch 1.7.0 3. torch-geometric 1.6.3 4. psbody-mesh 0.4 其中 pytorch、torch-geometric 请务必保证版本一致,否则可能需要改写部分代码,或者无法加载作者给出的训练好的神经网络模型(因为新版本的 torch-geometric 中部分图神经网络的结构被更改过,所以无法正常加载作者提供的模型数据)。 如果是 Windows 平台下,那么 psbody-mesh 官方版本是无法正常安装的(至少需要较大的改动,成本较大),可以用别人已经改好的 [0.3 版本](https://github.com/johnbanq/mesh/tree/fix/MSVC_compilation)进行安装。目前经过测试运行没有遇到大问题,0.3 的 psbody-mesh 是可以正常使用的。原作者运行的环境是 Ubuntu,所以如果是在 Win 上运行代码的话需要踩一系列坑。 ### psbody-mesh 库在 Win 系统上的安装 因为 psbody-mesh 库在 Windows 上安装比较麻烦,所以这里单独记录一下。 #### Boost 安装与配置 首先进行 Boost 的安装,从[官网](https://www.boost.org/)下载源代码:  解压到要安装的路径之后例如`C:\dev\boost_1_80_0`,然后运行`bootstrap.bat`,运行后在命令行用 `b2.exe` 编译 boost。 ```shell .\b2.exe --address-model=64 ``` 编译完成后添加环境变量即可:  #### Mesh 库的编译与安装 首先 `git clone` [别人魔改过的版本](https://github.com/johnbanq/mesh/tree/fix/MSVC_compilation)到硬盘上,然后在该目录运行指令: ```shell pip install --no-deps --install-option="--boost-location=<path_to_your_boost>" --verbose --no-cache-dir . ``` 其中`<path_to_your_boost>`替换成你安装的 Boost 路径。 之后,先将 `setup.py` 第 203 行左右有“visibility”的行注释掉,再运行指令: ```shell python setup.py sdist ``` 以及 ```shell python setup.py --verbose build_ext --boost-location=<path_to_your_boost> ``` 这一步可能会提示 `fatal error C1083: Cannot open include file: 'CGAL/AABB_tree.h'`,具体解决方法看下面的 *一些坑* 一节,解决了之后重新运行这一行指令即可。 最后 ```shell python setup.py install ``` 安装成功后,运行 `pip list`,如果看到列出的包中包含 `psbody-mesh`,那么安装就成功了:  ##### 安装特殊 PyOpenGL 随后我们需要安装[魔改过的 PyOpenGL](https://www.lfd.uci.edu/~gohlke/pythonlibs/#pyopengl),选择对应你的 Python 版本的 wheel 安装即可。据作者解释是因为 Win 下用 MeshViewer 的话需要调用特殊的 DLL,而这些 DLL 在默认通过 PYPI 安装的 PyOpenGL 中是没有的。 注意如果安装过旧版本的 PyOpenGL 的话需要进行一次卸载: ```shell pip uninstall pyOpenGL pip install <the-name-of-your-wheel-file> ``` 安装完成后,如果你需要进行测试来确保安装成功了的话: ```shell python -m unittest -v ``` 如果安装成功,那么最终可以看到这个窗口:  ##### 一些坑 理论上是应该像上面的指示那样顺利的,但是偶尔我们会遇到一些错误,这里整理了一些常见的错误以及解决方法。 ###### fatal error C1083: Cannot open include file: 'CGAL/AABB_tree.h' 即在 `python setup.py sdist` 的时候提示找不到 `CGAL/AABB_tree.h` 文件。 直接将 `mesh-master\build\temp.win-amd64-3.X\CGAL-4.7` 复制到 `mesh-master\build\temp.win-amd64-3.X\Release\CGAL-4.7` 即可解决。如果还不行的话那么可以把 `mesh-master\mesh\thirdparty` 下的 `CGAL-4.7.tar.gz` 解压,并重命名为 `CGAL` 文件夹,放到 `mesh-master\mesh\src` 目录下。 据[ShengbinWei 描述](https://github.com/MPI-IS/mesh/issues/35),还需要修改 `CGAL/Origin.h` 内容: ```C++ // 注释的就是原代码,改成没注释的样子 //CGAL_EXPORT extern const Origin ORIGIN; CGAL_EXPORT const Origin ORIGIN; //CGAL_EXPORT extern const Null_vector NULL_VECTOR; CGAL_EXPORT const Null_vector NULL_VECTOR; ``` 但是我自己实验实际上没改也是可以的。 ##### (可选)CMake 编译库 如果你要用到 MeshViewer 的话可能需要这一步,编译 mesh 生成 MeshViewer 运行所需的 .lib。 ```shell cd mesh-master/mesh/cmake/ cmake .. ``` 然后会看到生成了一个 `.sln` VS 工程文件以及一堆其他的文件,直接 Release 版本编译方案生成库即可。最后将生成库:  把这些库放到对应的目录下即可: ```Shell spatialsearch -> mesh-master/geometry plyutils -> mesh-master/mesh/serialization spatialsearch -> mesh-master/mesh loadobj -> mesh-master/mesh/serialization ``` ## Win 环境下改写部分源代码 首先是 `os.path.join()` 相关部分,因为原作者用到了类似`"{:0>4}_00.obj"`的变量来指代最终用到的、要输出的文件名,而且直接传入给`os.path.join()`。类似于: ```python cloth_file = "{:0>4}_00.obj" cloth_file_path = osp.join(dataset_path, "train_test", "mesh", cloth_file) # 在用到的地方才进行 format cloth = Obj(filename=cloth_file_path.format(233)) ``` 这么做在 Linux 系列系统下是没有问题的,但是在 Win下因为禁止使用`{}:>`之类的特殊字符作为变量名,所以原作者的代码无法直接在 Win 下运行,必须先进行 format 变成正常的命名之后再进行 `os.path.join()` ```python cloth_file = "{:0>4}_00.obj" # 传入参数前先进行 format cloth_file_path = osp.join(dataset_path, "train_test", "mesh", cloth_file.format(233)) cloth = Obj(filename=cloth_file_path) ``` 这样才能得到正确的路径。 此外,运行原作者代码的时候可能会遇到这种错误: ```shell AttributeError: Can't pickle local object 'DataLoader.__init__.<locals>.collate' ``` 这是因为原作者的 `DataLoader` 中用到了匿名函数,这是个 PyTorch 的 bug,把匿名函数改成单独的函数即可: 原本: ```python class DataLoader(torch.utils.data.DataLoader): def __init__(self, dataset, batch_size=1, shuffle=False, follow_batch=None, **kwargs): if follow_batch is None: follow_batch = [] def collate(batch): elem = batch[0] if isinstance(elem, list): return batch elif isinstance(elem, torch.Tensor): return default_collate(batch) elif isinstance(elem, float): return torch.tensor(batch, dtype=torch.float) elif isinstance(elem, int_classes): return torch.tensor(batch) elif isinstance(elem, string_classes): return batch raise TypeError('DataLoader found invalid type: {}'.format( type(elem))) super(DataLoader, self).__init__(dataset, batch_size, shuffle, collate_fn=lambda batch: collate(batch), **kwargs) ``` 改成: ```python class DataLoader(torch.utils.data.DataLoader): def __init__(self, dataset, batch_size=1, shuffle=False, follow_batch=None, **kwargs): if follow_batch is None: follow_batch = [] super(DataLoader, self).__init__(dataset, batch_size, shuffle, collate_fn=collate, **kwargs) def collate(batch): elem = batch[0] if isinstance(elem, list): return batch elif isinstance(elem, torch.Tensor): return default_collate(batch) elif isinstance(elem, float): return torch.tensor(batch, dtype=torch.float) elif isinstance(elem, int_classes): return torch.tensor(batch) elif isinstance(elem, string_classes): return batch raise TypeError('DataLoader found invalid type: {}'.format( type(elem))) ``` 当然也可以让 `num_workers` 变成 0,单线程加载数据,但是那样就会让整个网络读取数据的速度变慢,最终拖累整体的运行速度。 ## 参考 [installation of Windows 10?](https://github.com/MPI-IS/mesh/issues/4) [Mesh and Meshviewer cannot be used](https://github.com/MPI-IS/mesh/issues/51) [AttributeError: Can't pickle local object 'main.\<locals\>.\<lambda\>'](https://github.com/IBM/Project_CodeNet/issues/21) 最后修改:2024 年 04 月 20 日 © 允许规范转载 打赏 赞赏作者 支付宝微信 赞 随缘